How to Integrate SlickText With Mailchimp
Updated April 27, 2026
Marketing integrations make your life easier.
At SlickText, we offer dozens of integrations. One of the most common questions we get is, “Do you integrate with Mailchimp?” The answer is yes—and it’s actually been that way for years. Email is complimentary to most organizations’ text message marketing strategies, so having a smooth way to collect customer email addresses is important. Integrating email marketing with SMS campaigns can increase engagement and retention, increasing the lifetime value of your customers.
Here’s a quick tutorial on how to integrate SlickText and Mailchimp and get people to join by text.
1. Make sure you have a SlickText and Mailchimp account.
The obvious first step is to have your SlickText and Mailchimp accounts up and running. Both services offer free plans that you can get started with if you are small, just getting started, or want to test the waters before committing to a paid plan.
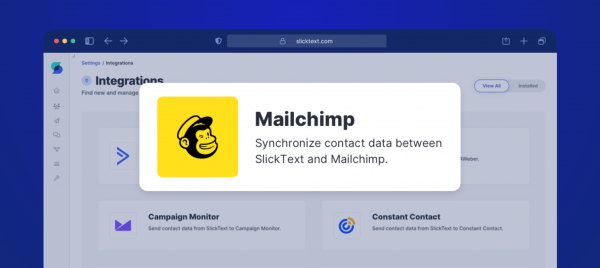
2. Give SlickText permission to talk to Mailchimp.
Once you have your two accounts up and running, your first step will be inside SlickText. You need to give your SlickText account permission to talk to Mailchimp.
To connect SlickText with Mailchimp, follow these steps:
- From the Dashboard, click on your name in the bottom left corner and choose Settings.
- On the Settings page, click on Integrations.
- Scroll through the list of integrations and click on Mailchimp.
- In the top right corner of the page, click the Install button, then click Install again to confirm.
- A Mailchimp login page will appear. Enter your credentials and click Log In.
- On the next page, review the terms, then click Authorize at the bottom.
- If the installation is successful, you’ll be redirected back to SlickText to configure the integration settings.
3. Configure Mailchimp integration settings within SlickText.
Syncing Data from Mailchimp to SlickText
Choose from three options for contact syncs:
- Create new contacts and update existing ones in SlickText: When a new contact is created in Mailchimp that contains a mobile number, a new contact will be created in SlickText. When changes are made to contact fields in Mailchimp that sync with SlickText, those changes will overwrite the contact’s existing data in SlickText.
- Update existing SlickText contacts only: When changes are made to contact fields in Mailchimp that sync with SlickText, those changes will overwrite the contact’s existing data in SlickText. New contacts created in Mailchimp will not sync with SlickText.
- Don’t do anything: When changes are made to contact fields in Mailchimp, nothing happens in SlickText.
Contact Opt-In Status
If Create new contacts and update existing ones in SlickText is selected, you’ll need to choose an opt-in status for these new contacts.
- If SMS permission is being collected when contacts join your audience in Mailchimp, choose Subscribed, which is the default option.
- If SMS permission is not being collected for your Mailchimp audience, choose Not Subscribed.
Syncing Data from SlickText to Mailchimp
SlickText’s automated text message service makes it easy to collect email addresses through an automated workflow. Select the Collect Email workflow template to get started.
You will see the same questions for sending contact data from SlickText to Mailchimp.
Choose from three options:
- Create new contacts and update existing ones in Mailchimp: When a new contact is created in SlickText containing an email address, a new contact will be created in Mailchimp. When changes are made to contact fields in SlickText that sync with Mailchimp, those changes will overwrite the contact’s existing data in Mailchimp.
- Update existing Mailchimp contacts only: When changes are made to contact fields in SlickText that sync with Mailchimp, those changes will overwrite the contact’s existing data in Mailchimp. New contacts created in SlickText will not sync with Mailchimp.
- Don’t do anything: When changes are made to contact fields in SlickText, nothing happens in Mailchimp.
Choosing a Mailchimp Audience and Syncing Contact Fields
Once you choose a Mailchimp Audience to sync your SlickText contacts with, a list of contact fields will appear. Email, First Name, Last Name, and Mobile Number will map automatically.
To sync additional contact fields:
- Click +Add Contact Field.
- Select a SlickText field.
- Select the Mailchimp field you want to sync with it.
If you don’t see a field you need to sync in SlickText:
- Open up another browser tab and create a Custom Field.
- Go back to your Mailchimp integration settings and click Refresh Fields.
- Select the new custom field and the Mailchimp field you want to sync it to.
See how easy it can be to add integrations to your tech stack? It’s worth noting that SlickText is a leading mass texting service. In addition to people’s emails, you also have their phone number and can reach them on their mobile devices using an SMS short code, 10-digit long code, or a toll-free phone number.
Other Important Information About Integrations
There is some other additional info about our integration with Mailchimp that you should know.
- Sometimes the email sync is delayed by a few minutes. This is due to Mailchimp’s “email verification process.” They take some time to validate the emails before they appear on your list. Know that we send your captured emails to Mailchimp immediately.
- SlickText stores a copy of all emails collected on our side. In case you ever need to download your emails, you can do so from the contacts page in your dashboard.
- Any email addresses that were previously collected through SlickText will not be synced with your Mailchimp list once you set things up. They only start syncing after you have completed your integration. If you have already collected emails before you set up the integration, you will have to download them all and upload them into your Mailchimp account.
Troubleshooting Your Integration
Most people don’t run into issues after they’ve set their integration up. However, if you do encounter issues with our native Mailchimp integration, check out the SlickText Help Center and Mailchimp Help Center, or reach out to our friendly support team. We love to talk to our customers.